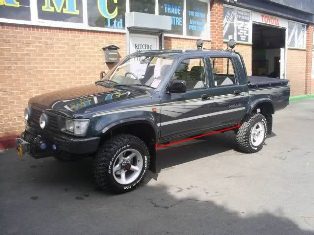
The outer sills on my truck were rotten – holes 10 inches long in some places and I had to change them. This is how it was done.

If I was doing this job again, I would give myself 3 days having done it once. If I had access to a workshop / large garage I would take that down to 2 ½ days as you are then not having to take off doors every morning and put them back on each evening, you are not going to get rained off the job and you don’t have to get out and put away tools each day.
You are going to need the following tools and materials:
- Metric socket set with 6 sided sockets 8mm, 10mmm, 12mm and 17mm and extension bar
- 600mm or longer socket bar
- Mig welder that will weld at 25/30 amps with gas, wire and mask.
- Angle grinder and lots of cutting and grinding disks
- Flat head and cross head screw drivers
- Mole grips and welding clamps (although you could just get away with mole grips)
- Electric Drill and metal bits (5mm if you are cutting holes to plug weld through)
- Jogglers with a punch if you prefer to punch the holes to weld through
- Metal snips
- Small and large hammer
- 1 inch chisel.
- Spot weld drill bit
- centre punch
- Stanley knife
- Marker pen
- Big bit of cardboard or some carpet
- Sandwich bags
- Seam Sealer
- Primers, paint, lacquer, sand paper, paint prep rags
- Some one to make tea
- Marlboros / roll ups (optional)
Advice
You should also have some WD40 for cleaning and freeing stuff, copper grease for when you put things back together and some rags or kitchen paper. You will need some good rust killer / inhibitor for the inner sill. I use Bilt Hamber Hydrate 80. Its good to have some scrap steel in case you need to make any more little bits of panel up too, I got away with using good bits of sill I had cut off but had some steel on standby anyway.
Protective equipment is up to you. I always wear mask when welding as I don’t want a flash, other than that just overalls, that’s why my hands are covered in cuts and burns and my legs and feet have burns on them from welding spatter. The spatter burns straight through trainers 🙂 .
The sills are only available from Toyota at the moment and come in at £134.49 + vat per side. Part numbers are T61412-35020 for the left hand side and T61411-35020 for the right hand side although if you phone up, give your chassis number and ask for the outer sills, parts boy should know what you mean.
I see no reason at all why the job would not be very similar for the single cab – from looking at pictures of a single cab sill, the front end and profile seem to be exactly the same, the double cab sill just being longer, having a pressing in it for where it sits under the B post and the rear edge has a little step in it.
Start by taking off the trims that sit on the sill / under the door. These have screws in the them, just take the screws out and the trim should pop off. Put the screws back into the trim and store them some where safe. Lift the hooks that hold the carpet off the sill.

You should be able to start to make out where the spot welds are – the entire panel is spot welded, making removal and replacement simple. If you are replacing a whole panel on a car, spot welding should be fine unless the original was seam / butt welded – use common sense and replace like for like. If you are cutting out and replacing part of a panel, it will have to be seam welded.
You might want to take off your wheel arch extensions and wheel arch liners on the front, but its not 100% necessary, it just means the wing will have less weight and so stress on it when you take it off and it makes it easier to get over the aerial on the near side.
The extensions and arch liner are held in place with self tappers and 8 mm headed ACME bolts. The same bolt it used to hold the mud guard in place, undo all but the inner bolt on this and push the mud guard under the truck. You might find the bolts are rotten and they snap and the screw heads are rotten and wont come undone. Its a Hilux. That’s what happens.
If like me, your inner wings are rotten, the wheel arch liner and extension should come away pretty easily. Try and take them off a couple of days before you start to see if the wing is rotten so you know if you need to buy a new one or you can repair the ones you take off. Would not be hard to weld some new metal where its needed or even rivet some new metal, hiding the rivets behind your wheel arch extensions, but I wouldn’t call this a permanent fix.
I then had to take my bumper off so I could be sure to expose all of the bolts holding the wing on. On putting the truck back together, I think its not strictly necessary as you could get to the bolts behind the bumper with an 8mm spanner.
To take off the bumper, there is an L shaped bracket at either end where the bumper mounts on a rubber bush. Again, the nuts on the bolt we rusted to bits. The bolt is welded to the L so all I could do was grind off the nut and as much of the bolt as possible. I later drilled through the original bolt and tack welded the new bolts in place to re-use the bracket, but they are available new from RoughTrax and Milners, they are about £7 a side.


As I have a winch on my truck, I first had to take off the top half the of winch – this was held on with 4 machine screws. I should have also removed the spot lights to avoid breaking the lenses (never mind, shiny new ones next pay day).
You now need to get down under the centre of the truck at the front and you will see the main fixings for the bumper are 4 17mm headed bolts. You will need as 17mm socket and an extension bar – my 600mm bar coped, but I wouldn’t like to try with a 400mm bar. I do have a 24V impact wrench that I tried to shift the bolts, but it wasn’t happening, so the bar was the only way for me. Might work with air tools, I don’t know. Once the bolts were loose, I could take them out with the impact wrench.
Now for the sandwich bags. Put the bolts in one of them and label it accordingly then put it some where safe. Do this For all bolts and fixings you take off so you do not lose them.

I then found out had to release the front panel that the lights are held in to lift the bumper out. You will have to remove it even if you decide to leave the bumper in place as it holds the wings on. It is held by 2 screws on each end and then you should be able to pop it off. While you are doing this the bumper should be secure as it sits on two arms. Once you have removed the screws from the ends of the front panel, you can lift it from its position (you do not need to disconnect the the lights to do this) and lift the bumper out. Give the threads from the 17mm bolts a spray of WD40 as it will help to keep them clean for when you come to refit. If you are a real boyscout you could put copper grease on the bolt and screw it back in, but this means taking it out when you come to fit back up.
You are now ready to take the wings off. The wings are held on with 10mm headed ACME bolts. The locations are in the following photographs.

These bolts will probably be so rusted they snap off right away. I replaced them with 40mm M6 bolts. Don’t worry about having to drill and tap for them as you will see these bolts are held by nuts welded to the new sill.

In the engine bay you have 4 bolts, two will have rubbers on them for the bonnet to rest on. Again, bag up and label everything you take off.


The above pictures show where the mounting bolts are behind the bumper. The one on the side, you should be able to see, the on on the front is actually on the other side of the panel, but you will be able to get your hand up there and feel it. The last bolt is behind the door – open the door and look at the top corner of the wing. You are going to have to put the 10mm socket on an extension bar to get in there.

Once this is undone, the wing should be free, if you have started on the off side, make sure you take the castellated nut off the aerial mount. You can now lift the wing up enough to expose the connection for the indicator, you might need a small screwdriver to push the clip part of the connector to get it apart. The wing can now be lifted off and stored for refitting if its in good condition. If not, store it away (don’t want pikeys taking it) as you will need the indicator and the wheel arch liner fittings, but these can be left in the wing until you need to take them out if replacing.
Now you have the wings off, its time to get the doors off. Taking them off and refitting them is a simple one man job. Wind down both front and back windows before you start un-doing anything as this makes moving the doors around so much easier. Knock out the pin that holds the door retainer with light taps of a hammer from below and then you should be able to lift it out.

Now, make sure your doors are closed properly. Prepare some card or a bit of carpet to rest the doors on for when you get them off.
The 4 bolts you need to undo are the hinge to door bolts. These require a 12mm socket on an extension. Slacken all bolts before you remove any, you don’t want to be in the situation of having 3 of the bolts out and one that take a lot of moving as you will have just that and the door lock mechanism holding the door on.

Once you have the 4 bolts out, get one shoulder in the open window and open the door. You should be able to lift it out of the aperture no problem, rest them on the cardboard or carpet you prepared. You should now be ready to start cutting!
Start off on the front section between the A and B post. With a metal cutting disc on a grinder, you can split the sill leangth ways down to middle so you can have a look inside fist, or just do as I did and cut the sill as close to the lips where it is welded to the inner sill. Be very careful when cutting next to the A post as there is an outrigger that you might cut into. If you do cut it, you can weld it back together so all is not lost if you get it with the grinder. There are some ‘hidden’ spot welds at the A post end of the sill. I drilled out enough spot welds holding the A post so I could get in. You can also get in to them by removing the piece of trim in the foot well.


Getting this bit of the sill out is the hardest part of the job, just as the area below the A post has a few different sections meeting up, so there are a few spot welds to cut out. I see no reason why, if the metal is good here why you could not leave an inch or so of the sill protruding from the A post, trim the new sill section and weld it up again, but I wanted to do it without cutting the new sill. All though you are then in the territory of replacing a section of a panel and by MOT rules as I understand them seam weld on the new sill all the way around, well, its up to you.
You should be able to see the joins between the sill and A post and B post as there is seam sealer between the two. Cut this out with a stanley knife. When you are happy you know where the outrigger is on the B post, cut as much of the sill away as you can, but try and leave ½ inch to an inch just below the B post as you are going to need to grip with the mole grips when you have released the spot welds to pull it out.

I tried two different bits for cutting spot welds. The first was from Machine and Mart and had a telescopic spike and what would be described as a very small hole saw. These blades break really easily and the tool leaves behind a nipple of metal that needs to be ground off. There are a few deep spot welds through a couple of pieces of metal that this just wont do. I then tried a spot weld bit from Screwfix. This is more like a milling bit, takes out the whole spot weld so no grinding is needed, it seems to cut much faster and it didn’t break or wear out.


Using the spot welding bit or a hammer, chisel and grips, remove the strip of metal pictured above. When drilling out spot welds, give the spot weld a good whack with a punch and hammer so the drill doesn’t slip.
The B-Post has 8 or 9 of spot welds to the sill, some of them very close together. Locate them by site, punch and drill them and when the remaining sill starts to move around, you should be able to feel where it is still attached. Drill out any remaining spot welds and the remaining sill should pull out easy enough.
Cut the top and bottom of the sill under the rear door and get the bit of the sill out. From looking at your new sill, you should see a lip where it locates at its rear into that nice curved section with the bung in the rear and you should be able to judge how far to cut back. Again, leave a little metal around the edge so you can pull. I think there were two spot welds in the rear section I had to chop with a chisel as I could not get in with the drill. It didn’t matter anyway as the lower C post was rotten I made a new one – I think if your sill is rotten enough to be replaced the lower C post will be on yours too, so removing that is the access you need when you come to weld back up.
All that remains one you have the pieces from the A, B and C post removed is to remove and of the upper and lower parts of the sill – you can drill out the spot welds or go at them with a chisel and grips as below. Notice the highlighted section. There are 3 or 4 of these on the inner sill – its not damage, its a water drain channel so when you come to weld back up, do not do your welds on these!

Once you have all the metal off, clean up the inner sill. Where it looked the worst on mine I removed rust back to bare metal and had a prod at it with a screwdriver to make sure there was enough metal there – all was fine but if I had made any holes I would have cut patches and welded them in, its would save welding patches in from the underside in six months time. Treat the area with rust killer / stabiliser – again I used Bilt Hamber Hydrate 80 as not only does it make rust chemically inactive, it forms a seal, just make sure you get rid of all the rust first as you do not wan to trap any moisture. You can then grind the upper and lower edges of the inner sill to remove any paint, snots of spot weld and contamination.
Once the surface prepared, offer up the new sill. This can be a two person job to get it seated right. Make up where you want your spot welds to be on the new sill with a marker, take the sill back off and using a centre punch and 5mm drill bit or a joggler / punch tool, cut the holes to weld through. When marking up, mark in the same location as the old spot welds, that way you cannot go wrong.
Put the new sill back on and have a cup of tea.
After the tea, disconnect both batteries and the alternator. The alternator has 3 connections – a triangular grey plug, a square black plug and a heavy wire bolted on to the top, hidden under a grey rubber cover. Lots of different ideas on disconnecting batteries and alternators – for example on a ‘modern’ car with an ECU and lots of electrical equipment people recommend leaving them on as they help to prevent voltage spiking and what not. For a couple of minutes under the bonnet tho, I get the piece of mind my batteries are not going to explode and my alternator will still work. If I had an ECU, I would probably remove that as I have heard too many stories about expensive bits getting cooked 🙂 .
Below the B pillar, grind the primer / paint from the new sill as you are going to attach the earth here. When welding on a car, always have your earth close to the weld. There is no point attaching far away so the electricity has to travel through lots of bits of car.
Make sure you have had a few goes on the welder to see it is set up right so you dont end up burning a load of holes. I used a Clarke 165 Turbo, which on its lowest setting gives out 30 amps. Consider 30 amps the most you want to use, I would have preferred to use 25 amps. For the spot welds, the wire speed was set to 3.5 on this machine. I then attached the earth clamp, turned on the gas, switched on and got the welding helmet comfortable.
Clamp the sill within about 1inch of the hole you going to weld through with welding clamps or mole grips, you want the metal to be together with no gaps around the hole. Feed half to three quarters of an inch from the end of the shroud on the welder, and then get the torch up close to weld – I had it 1 ½ inches from the weld. Aim the wire at the very centre of the hole so it goes through and contacts the inner sill first. If you do not, the weld will not penetrate the inner sill and all that will end up happening is you fill in the hole you made to spot weld or burn a hole in the new sill. If you do fill in the hole without penetrating, grind the weld flat, centre punch it and drill it out and do it again.
If you burn a hole, you will have to repair it with weld – make small welds to fill the hole. Once you have some small welds in place, you can make bigger welds as the weld you have put down will not burn through nearly as quick as the sill will. Again, grind and tidy up each one. When it has cooled down sufficiently, get some primer on it. I used Number 8 etch primer on all welds and exposed metal with a view to covering with normal primer then paint.
Plug weld all the panel, remembering there are some in the B post. Once you have the whole sill on, check your welds. You can do this by trying to get a screwdriver between both inner and outer sill – if you can, check the nearest welds and see if the weld has penetrated – if it hasn’t, drill it out and do it again. Apply seam sealer to the lower A, B and C pillars.
You can now go on and do the other side.
If you need to put the doors back on as you are working outside and its getting late / raining, just lift them back into the appature and press it in. The lock will hold the door while you get at least a bolt in the top hinge and one in the bottom hinge and always refit the doors rear first, front second.
Once you have both new sills on, you can repaint. Best to have the doors off for this, but make sure when you come to put everything back together, you put the doors on before the wings. This is one of the new rear lower C pillars I made.

It was made from 2 pieces of steel – some from the old sill and some from some steel I had lying around. I made the outer section fist from some sill, as it was already nearly the right shape. I tack welded this to the lower C pillar, then made some longitudinal cuts in its rear edge to I could fold tabs around on the curve. The picture I made in paint should help with the idea.

The rear section was easy to cut out and it quite self explanatory. Making the hole for the bung was a bugger, in the end I marked up and drilled the circle out and tidied it with a file. This was then spot welded on and tacked to the other part, I then started doing full welds, paying attention to the first piece where I had cut for the tabs to fill those with weld. I built up this area then grinded it to shape.
I did get new wings, so I then cut the holes for the indicators as they did not come pre cut – again, drilling and filing. Cleaned the wing, couple of coats of primer, couple of coats of paint and offered them up. The panel fit was not nice, with the wing bellying out on the edge where it meets the door and not sitting right with the bonnet. I looked at the old wing and there is a spacer that goes between the wing and sill – once this was fitted the panel was good fit.
Remember, if the bolts for the wing to sill rotted out on your old sill, you just need some 40mm M6 bolts – any car care shop should sell them. Waxoil underneath and the leading edge of the a post and sill and get as much as you can in through the grommet.
Once the wings were on, the bumper went back on, then the panel above it, reconnected the alternator and batteries and realised some on had stolen my number plate.