Author: Dfg

  • FM and TV DX

    FM and TV DX

    FM and TV DX

    Basically DXing is the art scanning the airwaves for distant signals. There are many forms of DXing, including AM broadcast band, shortwave, FM broadcast band, and even TV DXing, to name a few.

    Always, the goal is to pick up stations from as far away as you can. You are probably wondering how long distance tv and fm reception is possible, well it all depends on the weather and the seasons that effect signal propagation at different times of the year, we can enjoy almost every form of signal propagation known to exist.

    FM signals sometimes get “ducted” over great distances by various weather phenomena. Signals sometimes bounce off of highly ionized patches in the ionosphere known as sporadic E clouds, enabling reception of signals from 1,500 miles and sometimes beyond. FM signals even bounce off the ionized trails left behind by meteors as they burn up in the atmosphere. with the right antenna setup anyone can receive long distance signals

    More info:

    • http://www.amfmdx.net/
    • http://www.dxing.com/tvfmdx.htm
    • http://www.anarc.org/wtfda/intro_to_fm_dx.htm
    • http://en.wikipedia.org/wiki/TV_and_FM_DX
    • http://www.tvdxexpo.com/

    By Daktologist

    Discuss this.

  • Beginners Guide to Radio Scanning

    Beginners Guide to Radio Scanning

    Daktologist’s Beginners Guide To Radio Scanning

    Before I begin I would like to say that this is from personal experience and worked for me but you may have different ideas so please add your ideas :). This guide shows my current set up and deals with setting up a desktop scanner due to the slightly more difficult set up required, although hand held scanners are available they are simple to set up and mainly require you to insert the correct batteries attach the supplied antenna and your ready to go. Unfortunitly in parts of the world scanning is illegal ( parts of Europe from memory. ) so if you get arrested it isn’t my problem, fortunately here in nz you can listen to anything you want apart from encrypted signals so it is no problem.

    Anyway first you will want to find a place for your scanner preferably close to a power socket so you can plug it in and close to where you will put your antenna as you will want to keep your antenna cable as short as possible to prevent signal losses which prevent reception of weak signals.

    The other main thing you will want to do is google the frequencies of things like the police and airport or whatever you want to listen in your area too as this makes things easier than trying to search for the frequencies of things manually as it may take a while. I commonly listen to the cops as some funny shit does happen from time to time, that and it can be handy to know if your about to be raided or what not, and you can listen in on phone calls and the lulz do ensue from time to time especially listening in on people you know, its amazing what you can learn about someone from their phone calls.

    Anyway its up to you really what you can listen to and your scanner can unlock this whole different world of radio you didn’t know existed.

    So what can you listen to other than the cops and the phone calls of that random girl you use to work with you ask? Well apart from law enforcement there’s air traffic, utility’s, fire, ambulance, pagers, your neighbours outdated cordless phone, shipping, the international space station and the list goes on

    Welcome to the world of Radio Scanning

    Receiver

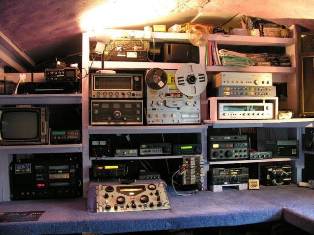
    The Receiver or “Scanner” as it is also known is by far the most important part as if you didn’t have it the rest of this guide would be useless, as you can see in the pic below i am using the Uniden UBCT8 as it is easy to set up and to use especially for a beginner and will get you scanning the airwaves in no time. Scanners either come as a desk unit as mine is or a hand held unit as the pic of my hand held scanner shows

    The Receivers that I’m currently using:

    Desktop Scanner

    Handheld Scanner

    Antennas

    I personally just used a spare TV antenna that i had lying around and it was the cheapest option for me, as you can see in the next pic I have it in the vertical orientation as nearly all signals around here are vertically polarised. You may want to play around with the orientation as the polarisation of the signal you want to receive may be different to what it is for me. It is important that you get the polarisation right as you can go from receiving a strong clear signal in one orientation to no signal at all or at the very most a weak and noisy signal in the other so it pays to check the polarisation before blaming the weak signal on being too far away from its source or a useless antenna

    My Antenna:

    as you can see I have two antennas connected which are connected to the scanner through a splitter ( not shown ) as I’m trying to receive signals from two locations, at times yagi antennas like the antenna on the right can be a pain as they are directional where is the folded dipole on the left isn’t and allows reception of signals from any direction. I mainly have the yagi for receiving the somewhat weak signals from the airport ground control and from the closest city, mainly due to the radio traffic being higher and there being more to listen in on and therefore have it pointing about halfway between the airport and town so I can receive signals from both somewhat while the folded dipole makes it easier to receive signals from nearby as well as strong signals from town

    Cabling

    The cable between your scanner and antenna is an important part as is the choice in cable type. Coaxial cable is recommended as cable losses are lower than just using regular electrical cable or 300 ohm ribbon cable ( old style TV cable ) if you do use ribbon cable ensure it doesn’t come in contact with metal objects such as the antenna mounts as this increases losses. coax can be attached to metal objects as it is shielded. I use RG6 coax usually as it exhibits lower losses than RG59 or similar

    Connectors

    Attaching the correct connector to the cable for your scanner is important as if you get this wrong you cannot connect your cable to your scanner obviously. The two most common connectors are the BNC connector which you push and turn to attach it, and the N connector which is slightly larger and screws onto the socket on the receiver. As you may be able to see in one of the pics below you can see that i am using an F connector to BNC adaptor as it was what i had at the time and these can be an option if you have a TV antenna with an F connector attached to the cable already or if you have a screw on F connector as crimp on BNC connectors need a proper crimp tool to attach them and the crimp tool can be expensive. I commonly use F connectors and an adapter as it is quick and easy to attach to the cable. In case you are asking your self “what is an “F” connector well they are the same as the screw on connector that is on the cable that feeds your satellite TV receiver

    BNC Plug

    BNC Socket on the back of my scanner

    Balun

    A balun is a impedance matching transformer that converts the balanced 300 Ohm output of the antenna to the unbalanced 75 ohm coaxial cable. If you don’t use a balun then weak signals can be harder or impossible to receive

    The balun that is on my antenna:

    Discuss this.

  • Receiving SSTV Images from The International Space Station

    Receiving SSTV Images from The International Space Station

    Receiving SSTV Images from The International Space Station

    It is possible to receive images from the international space station using a radio scanner and a computer. one of the problems with this is that reception is very hit and miss and requires a lot of patience, even if you dont pick up anything the first time dont give up because sooner or later you will hopefully receive something. At times when the Shuttle is visiting (Not for much longer) or when a space walk is occurring you wont receive any thing as they turn the radio off for safety reasons.

    Equipment you will need:

    • Scanner and antenna
    • Computer running SSTV software such as this: http://www.dxzone.com/cgi-bin/dir/jump2.cgi?ID=1854
    • Tracking software such as http://www.dxzone.com/cgi-bin/dir/jump2.cgi?ID=2706

    First check what times the ISS will be over your location. make sure your scanner and computer are good to go before the ISS begins passing over, connect your scanners audio out to the line in port on your pc then tune the scanner to 145.800 MHz, click auto receive on the SSTV program and wait. hopefully you will receive something but if not try again during a later pass

    By Daktologist

    Discuss this.

  • Moon Bounce – Using The Moon As a Satellite

    Moon Bounce – Using The Moon As a Satellite

    Moon Bounce – Using The Moon As a Satellite

    EME is a technique where the moon is used to reflect radio signals from one part of the world to another. The moon is reflective to radio waves and acts as a passive satellite.

    Amateur operations use VHF, UHF and microwave frequencies. All amateur frequency bands from 50 MHz to 47 GHz have been used successfully, but most EME communications are on the 144, 432, or 1296 MHz bands. To listen in you will need a radio capable of receiving CW and/or SSB as Morse code is commonly used with EME, Voice is used but is less common than morse. you will need a Yagi antenna with at least 12 dBd gain.

    Because the moon moves in relation to Earth, there is a slight doppler shift on EME signals. At moonrise, a 2m EME signal may be shifted up in frequency by as much as 350 Hz. The doppler slowly comes down, reaching zero when the moon is passing your longitude, then starts to shift in a negative direction, going as much as 350 Hz down by moon set.

    The moon follows many cycles. The distance between the Earth and the moon is not constant. It varies, and generally there will be a perigee (moon closest to Earth) and an apogee (moon furtherest from Earth) each month.

    Path loss to the moon and back is roughly 2 dB less at perigee than at apogee. This can make a very noticeable difference for small stations. Also, the sky behind the moon can be very noisy at certain times. All planets, stars, etc. emit noise across the radio spectrum, and most EME systems are sensitive enough to hear this noise. Sky noise is generally at its worst when the moon is crossing the galactic plane (moon appears in the milky way), which occurs twice each month, this can make receiving weak stations difficult.

    Signals also tend to exhibit a rapid, almost fluttery fading known as libration fading. This is caused by the irregular surface of the moon, which “rocks back and forth” slightly as viewed from Earth. Libration can cause signals to go above and below the average level. Libration peaks, which can last up to a couple of seconds at 2 meters, can actually help the small station make contacts they would not be able to otherwise.

    To transmit signals off the moon you will need a minimum of 150 watts and a low noise amplifier to amplify the weak signal that you may receive, when transmitting you will notice that when you stop to receive you will hear your own transmission as your own signal will reflect back to you

    By Daktologist

    Discuss this.

  • Sending and Receiving Pictures by Radio

    Sending and Receiving Pictures by Radio

    Sending and Receiving Pictures by Radio

    Slow scan TV is a way to send still pictures by radio. Pictures can be sent by using SSTV software to convert pictures into audio tones which are then transmitted to who ever you are trying to send pictures to. SSTV generally takes between 8 seconds to a couple of minutes to send depending on the mode used, size and whether or not the picture is color or greyscale.

    The main SSTV modes in use are AVT, Robot, Martin and Scotty. It depends on the mode used and the settings used with a particular mode as to how long it will take to transmit, picture quality and color. e.g AVT 8 takes 8 seconds to transmit a greyscale picture 128×128 in size which is the smallest and fastest mode but has poor picture quality where Martin M1 takes 114 seconds to transmit a color picture with 240 scan lines and with good picture quality

    To receive SSTV all you need is a shortwave radio capable of receiving SSB signals, an audio cable and SSTV decoding software that can use the soundcard as an input.

    SSTV can normally be heard on the following frequency’s

    3845 kHz LSB
    7170 kHz LSB
    14,230 kHz USB
    21,340 kHz USB
    28,680 kHz USB

    By Daktologist

    Discuss this.