How To Install a Satellite Dish and Receiver
This guide will introduce you to the world of satellite TV. Receiving free satellite TV is cheap and easy, and can be installed by someone with even very limited technical experience.
Equipment Needed
- Satellite Dish
- Ku Band LNBF ( if one isn’t provided with the dish )
- Mounting Bracket
- Heavy Duty Wood Screws ( if they don’t come with the bracket)
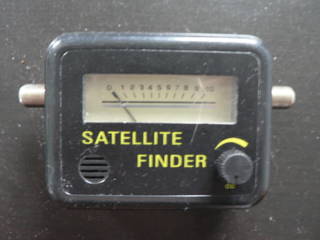
- Satellite Finder
- RG6 Coax
- Wire cutters
- Spanners
- Knife
- “F” Connectors
- Satellite Receiver
- Compass
- Weather Proof Sealant ( Silicone)
Satellite Finder:
LNBF:
How the dish works
First off, The satellite dish. Basically it acts as a reflector that focuses and reflects the signal to a small device called an LNBF. The LNBF receives the satellite signal and converts it to a lower frequency that can easily be transferred down regular coaxial cable. As you can see below the pic shows how the dish works
Setting up your dish:
Firstly assemble the dish according to the manufacturers instructions, Next you will want to look on www.lyngsat.comand search for satellites in your part of the world. After finding the satellite you want to receive from go to http://dishpointer.com and select the satellite you chose from lyngsat from the drop down list, enter in your address and it will give the compass bering and elevation settings for your dish.
Next mount the bracket on your house [B]( south side if you live in the northern hemisphere or on the north side if in the southern hemisphere )[/B], ensure the spot has a [B]good view of the sky[/B]. Coat around the mount with sealant so water doesn’t rot the timber its attached to Attach the dish to the bracket as shown in the manufacturers instructions. tighten the bolts just enough so you can still move the dish side to side and up and down. Next take your compass and aim your dish so the arm ( The pole in front) points to the compass bering you wrote down earlier. tighten the d-clamp nuts so you cant move the dish side to side. Now connect the cable to the LNBF as shown in the instructions. if you have done it correctly it should look like this
Correct mounting :
LNBF Connection :
Ensure you place the supplied rubber weather boot over the connector before connecting it so water doesn’t leak in and damage the LNBF
Now run the coaxial cable from your receiver to where the dish will be mounted, attach “F” connectors to each end
Alignment of your dish
Next connect your receiver as shown in the instructions, you wont get a signal yet as you need to align the dish. Switch the receiver on, this provides power through the coax to power the LNBF and the satellite finder. Now take a short piece of coax about 2 feet long and attach f connectors to each end. this forms a jumper cable so you can attach your satellite finder. if done correctly you should see the needle on the satellite finder moving and it may make a whining sound (depends on the satellite finder).
Connecting the Receiver :
Now move the dish so the elevation arrow points to the elevation you got from dishpointer.com. as you can see in the next pic it shows the arrow and numbers that indicate the elevation
Elevation :
Arrow is the indent on the black part below the silver numbers pointing to 45 degrees.
Now tighten the elevation nut on the dish so the dish doesn’t move up and down. Now rotate the LNBF so you get a higher reading on the meter stop once you get to the highest reading you can get, if it goes full scale turn the gain knob down and keep adjusting the LNBF until the reading doesn’t get any higher, tighten the screw on the LNBF bracket when done. Congratulations you have now aligned your dish, ensure all nuts and bolts are tight to prevent movement. it should look something like this
Dish :
Tuning Receiver
Following the instructions that came with the receiver set the Local Oscillator frequency ( Printed on the LNBF) next find the satellite you are trying to receive in the satellite database of the receiver select it and save your settings. The following pics explain the reason behind selecting the correct satellite from the database:
I’m trying to receive Optus D1 as you can see I’m getting a signal when OPTUS D1 is selected
However if I select OPTUS C1, I have low signal and no signal quality
Next find the signal meter on the receiver menu and ensure that the signal strength and signal quality bars are at full or near full, if not check your alignment and cabling. now select auto scan and scan for channels. If all goes to plan it will find channels and you can now sit back and enjoy the satellite TV that you just installed
Signal strength menu (Taken from my DVB-T Receiver but is similar on most satellite receivers
Local Oscillator Freq ( Marked L.O) :
Well that mostly sums it up, If you have any problems let me know and I will do my best to help you sort it
By Daktologist
Discuss this.